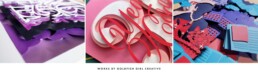
Pros and cons of making paper-cut illustrations by hand vs. digitally
I was scrolling through Pinterest the other day like any average millennial bored during breakfast and realized that a lof of the paper-cuts shared in the endless rows of pins were actually digitally made—skillfully placed gradients, drop shadows, and textures mimicking the real thing. I knew Adobe programs like Illustrator and Photoshop could be used in place of adhesive foam stickies and exacto knives, but I didn’t realize that so many of the dimensional illustrations that I loved and recognized were made of pixels, not paper.
Obviously, I prefer to build my paper illustrations by hand—I can be a bit of a traditionalist that way—but for those of you out there interested in trying the paper-cut style out, I thought it might be interesting to compare the two methods of building dimensional art. I did my best to remain objective in my evaluation…
Tangible Building Pros
- Process
Process is important. When you let the creative process inform the work, your art, illustrations, writing, whatever, come out better and you’re able to take more away from it. If you want to throw something together real quick, cool, do your thing (though we may not get along so well). But becoming a stronger creative requires you to give a shit about the process and learn from it, and building by hand offers a lot of room for experimenting, playing, and learning. Now, that’s not to say digital doesn’t offer room for this too, but I personally think working in the tangible does create more space for this.
- The Happy Accident
This ties into process. I find that when you make things by hand, you’re waaaaaaay more likely to have happy accidents, which not only make your work better, but gives you more opportunity to improve your process. Every creative loves a happy accident.
- It’s More Fun (Duh)
Again, this is a personal preference thing, but something about physically building these illustrations is just soooooo satisfying and cool.
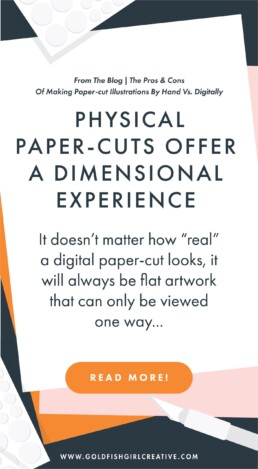
- A Dimensional Experience
It doesn’t matter how “real” a digital paper-cut looks, it will always be flat artwork that can only be viewed one way. Looking at a tangible paper-cut—where depth and shadow are built with layers of foam and thousands of tiny adhesive pieces instead of simulated with pixels of varying shades— is a whole experience. Changing the lighting or viewing it from a slightly different angle gives you a whole new view and can add a lot of interest to the artwork. Real dimensionality gives your illustrations…dimension! Funny how that works lol.
- Social Sharing
Speaking of viewing angles and lighting, there are a lot of cool ways to take pictures of physical paper-cuts for things like social media. If you’re like me and social media is a bit of a chore, having lots of interesting images of a single illustration can be really helpful for filling a social account with cool content. Just sayin’.
- Limitations
This is another personal preference thing, but one that I think a lot of creatives can agree with me on. There is such a thing as too many options. It’s easier to play when you have some parameters or limitations, like paper color and gravity, to work with. And problem solving for some of these limitations can lead to some nifty results.
- The AW Factor
There is just something really freakin’ cool about seeing a big, super detailed, dimensional, paper illustration that you know someone meticulously cut and carefully pieced together without the ability to command z away their mistakes. Being able to see the human quality in an awesome illustration makes it that much cooler.

related article | Essential tools for building paper-cut illustrations

Digital Building Pros
- You Don’t Need Much Space
Building paper-cuts by hand can require a lot of damn space, especially if you have more than one project going on. Then, on top of that, you also need space to store materials and finished illustrations. It’s something I am currently trying to navigate in my small space. But when you’re building digitally, this is much less of a problem.
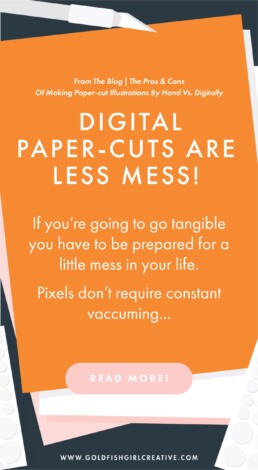
- Less Mess
Working on a computer or iPad not only doesn’t require much space, but it is far less messy too! It doesn’t matter how diligent I am in trying to keep my space clean, I am always finding tiny scraps of paper or adhesive dots around the house or on my clothes. Always. If you’re going to go tangible you have to be prepared for a little mess in your life. Pixels don’t require constant vaccuming.
- Less Expensive
Material costs add up crazy fast for handmade paper-cuts, especially when you have to start buying cardstock, foam boards, and like 10 different kinds of adhesive in bulk. The Adobe Creative Cloud Suite cost something around $400 annual if you pay it in one lump sum…which is almost nothing compared to what I’m spending on large projects…
- No Shipping
If you follow me on social media or have read other blog posts of mine than you know about some of my early struggles with shipping my paper-cut illustrations. I still have anxiety every time I drop a piece off to ship. Unless you’re sending prints of your digital pieces off, this isn’t going to be a concern for you if you are building your works digitally (and even so, shipping prints is a much simpler process). Not to mention, professional grade art shipping boxes can get expensive too.
- Command Z
Paper is not forgiving. If you accidently cut wrong, crinkly, bend a corner funny, or put glue on the wrong side, and you’ve got to get a new piece. The paper doesn’t care if you just spent an hour meticulously cutting all the tiny details of a design and your hand/ back are sore…one wrong move and you’re either starting over or figuring out a way to hide the mistake. It can be very frustrating. There’s no two-key command for a quick fix like when you go digital. I love working by hand, but damn it that command z option is soooo useful!
- Can Work on Them Anywhere (Like in a Comfy Bed)
I don’t know about you, but when the weather is shitty, rainy/snowy, and cold, there is nothing I want to do more than work in my nice warm bed with my dog curled up next to me. If you’re building paper-cuts by hand this is definitely not an option! The last thing you want is a sharp ass exacto knife or blade getting lost in your bedding! Don’t do it! But you can bring gradients from bed.
- Fewer Band-Aids
Speaking of sharp objects…I can’t tell you how many times I’ve accidently cut myself because the blade jumped the ruler. Just this week I had an incident where I almost lost a bit of my left, middle finger. And little, unassuming papercuts that don’t bleed can still hurt quite a bit! The chances of your laptop or iPad biting you or taking a chunk out of your fingertip are slim to none. If you have somehow been attacked my by your laptop or iPad, leave me a comment at the bottom, I gotta hear that story!

At the end of the day, I recommend trying out both methods and seeing what works for you and your style. You don’t need a major, paper-cut studio to try out the handmade method and there are tutorials all over the Youtube and the internet if your need help figuring out how to work a gradient to create the best shadow affects. Just jump in!
If you’ve tried these methods or are a paper leave a comment below and tell me about your favorite tools or some of your pros and cons!
Save for later!